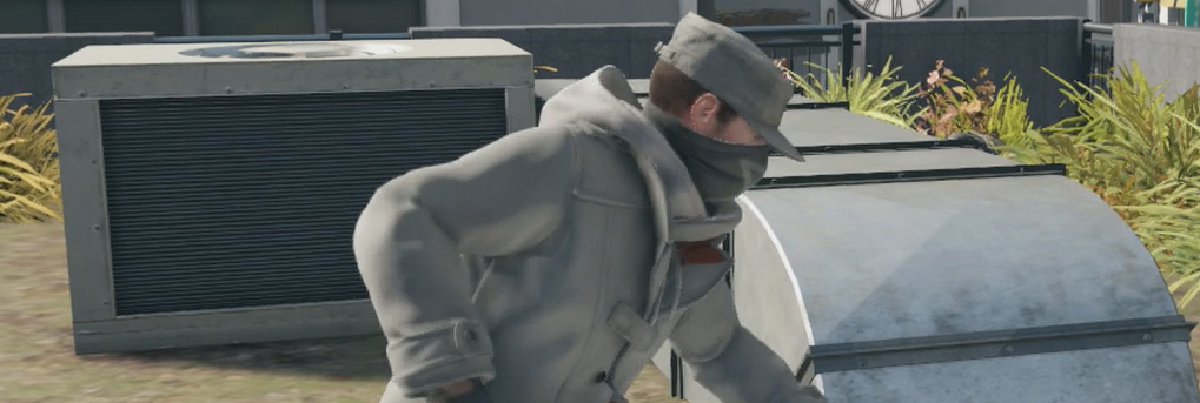
Perhaps it’s just us, but the Gang Hideouts in Watch Dogs are more fun than they should be. It’s straight up stealth combat with some fairly substantial rewards for your trouble. The only problem is finding all 16 of them.
Whether you’re having trouble locating a few of the Gang Hideouts, or simply can’t figure out the best way to take the target down, our guide should provide you with the tools needed to succeed.
Before You Begin
Gang Hideouts come in three phases, with each one being unlocked at a certain point in the campaign and offering increasingly higher rewards.
- Phase 1 – $2,500 Reward – Act 1 – Mission 7: Thanks for the Tip
- Phase 2 – $5,000 Reward – Act 2 – Mission 6: Jury-Rigged
- Phase 3 – $10,000 Reward – Act 3 – Mission 3: A Pit of Paranoia
It should also be noted that not all 15 of the Gang Hideouts will show up on your map when the story has progressed beyond the missions listed above. You will need to spend time profiling the citizens of Chicago here. To do this, head to a highly populated area and keep your phone out. In addition to the occasional Gang Hideout, you’ll also discover Criminal Convoys, Crimes Detected, Fixer Contracts and quite possibly more. To give you an accurate idea, we were at 14 of 15 Gang Hideouts cleared, then had to spend an hour walking around and profiling citizens to find the last one.
In addition to the cash rewards listed above, there are also several weapons and trophies that you can obtain by completing a certain number of Gang Hideouts.
- Complete 1 Gang Hideout: AK-47 Weapon
- Complete 5 Gang Hideouts: Rapid Reload Skill
- Complete 10 Gang Hideouts: Spec Ops SMG-11 Weapon
- Complete 15 Gang Hideouts: Basest Base Trophy/Achievement
The order that you will see the Gang Hideouts below might differ greatly from the order that you find them in. We make no promises that our guide won’t have you driving from Pawnee to Brandon Docks, then back again several times over.
When you first approach any Gang Hideout, your best course of action is to hack a nearby camera while you’re still outside of the restricted area. Use the camera to hop from one to another, tagging all of the guards in the area and locating your target. You could also use this method to thin your opponent’s out a little bit, but this risks alerting them to a threat and raising their awareness. Our approach will change from hideout to hideout, but generally speaking stealth is the best way to go. With that in mind, the Spec Ops 1911 and Spec Ops Goblin are two very helpful weapons.
Gang Hideout 01 – Port Authority – Brandon Docks
You should be approaching from the southwest of the building. Stay outside the restricted area and hack one of the cameras, using it to hop from one to another, revealing all the guards and your target who is on the second floor to the building.
Use your Spec Ops 1911 to clear out the guards on the south of the building, then travel north while you stay on the west side. Continue to pick off the patrolling guards until it’s just you and the target. Keep in mind, you can’t kill him. Move from cover to cover, sneaking up to his location and taking him down
Gang Hideout 02 – Packing – Brandon Docks
You’ll approach this one from the south. Our advice is to stop along the southeast wall before you get in the compound, hacking the camera high on the building to the north. Use that camera to bounce around the area, tagging all of the enemies and locating your primary target.
There’s no danger of your target fleeing so we went full hack on this one. Use the cameras to detonate a few of the explosives the guards are carrying around, as well as some of the devices that they frequently patrol near. You won’t get them all, but you should take out a handful.
Once things are cleared out a little bit, make your way into the compound with your Spec Ops 1911, then pick off any stragglers you see. If you come across a few bunched up guards, think about throwing one of your IEDs in their direction for the multi-kill. Once all his goons are down, sneak up on and take down your target to complete the mission.
Gang Hideout 03 – Swap Meet – The Wards
Approach the east gate and hack the camera to the north. Use it to move around the restricted area and tag all of the guards, including your target.
When you’re confident you have everyone tagged, backtrack to the dumpster along the east wall. Climb into it, then up onto the platform above. You should have lots of cover here to start picking off bad guys using your Spec Ops 1911. Try to make shots as guards move away from open areas to ensure the bodies can’t be discovered. Continue to stealth around the area until you’ve got a clear path to the target, then take him down and make your getaway to complete the mission.
Gang Hideout 04 – Compliments for the Cook – The Wards
Approach this one from the north, moving just inside and taking cover behind a stack of construction supplies. You should have a camera nearby that you can hack, then use to tag all the guards as well as your main target.
We were able to take everyone out from this location, throwing Lures to distract people, then snagging headshots with the Spec Ops 1911. You can also use your IED, but be careful not to kill your target. Once all his guards are down, sneak up on the boss and take him out with your baton to complete the mission.
Gang Hideout 05 – Union Dues – Parker Square
Approach from the north, heading south until you see a blue lift on the ground next to a building. Jump in and hack the lift, taking cover against the edge so you aren’t spotted by guards on the upper levels. In fact, there is a guard as soon as the lift reaches the next level. Although he might hear you, you’re still on the outside of the restricted area so you should be safe. Just pop up and put a Spec Ops 1911 round in his head when you get the chance.
Climb out of the lift and up the scaffolding to the right of the door. Hack the camera in the area and use it to tag all the guards. Your target is very close, so thin out a few goons and then head straight for him, taking him down and then making your escape the same way you got in. Mess with the other guards if you want, but it’s not necessary. When your escape is complete the mission is done.
Gang Hideout 06 – No Parking – The Loop
Approach the restricted area from the south, jumping in the blue lift and taking it for a ride to the top. Hop out of the lift and take cover behind the curved wall in front of you. There will be two guards close by, but another two a short distance away on the same level. Pop both the guards close to you using a weapon with a silencer. Headshots only if you don’t want to be detected.
With them down, hack a nearby camera and use it to jump around the area, tagging the guards as well as your primary target. Once you have an idea of the level of resistance and location of the boss, move up and start taking bad guys down. Once his goons are neutralized, take down your target to complete the mission.
Gang Hideout 07 – Two for One – The Loop
This one is just fun. Approach from the northeast, climbing up the staggered levels of flower beds until you’re on the roof. Take cover behind the air vent before the curved glass, then when the guard isn’t facing you, take him out with the Spec Ops 1911. Immediately sprint across the curved roof and use the next set of vents to hide. Target the next nearby guard and do the same to him as you did the first one.
Hack the camera to the south, then use it to tag all the enemies, including both bosses in the area. Once they are all revealed on your map, move south yourself and take cover behind the vents. It should be no trouble at all for you to use stealth, moving clockwise around the area to eliminate each of the bad guys with your Spec Ops 1911. When they’re down, move in and take out both of your targets to finish this mission off.
Gang Hideout 08 – Gone in a Flash – Brandon Docks
Approach from the south and use the cameras to move around the area, tagging each of the guards and then the boss.
Stay up top, using the railing for cover and taking out the guards who approach on their patrol. You’ll be able to get at least three before you ever hop down to ground level. When you do hop down, move into the shadows provided by the shipping containers. We chose to move counterclockwise around the area, taking headshots with our Spec Ops 1911. Once you have a clear path to the boss, take him down and then either flee the area of finish off his goons to complete the mission.
Gang Hideout 09 – Street Cleaning – The Loop
We opted to enter the area from the northwest, using the large dumpster for cover when we hacked the nearby camera. Tag each of the guards, including the target before moving in on the hideout.
There’s a lone guard patrolling near the van. Wait for him to turn his back to you, then take him down in whatever manner you please. Go down the nearby stairs and take cover behind some stacks of plywood, taking out the guard near the van, as well as the one patrolling to the southwest. If you’re using the Spec Ops 1911 like we were, someone might hear you but you’re fairly safe behind the cover you have.
Whether someone hears you or not, this is the best place for you to fight. Throw a Lure to attract a few more guards to the area, then hit them with headshots. There are only seven total guards so when they’re all down, take out the boss to complete the mission.
Gang Hideout 10 – The Tower – Made Mile
This one can be tricky given you only have one option to approach the situation. Still, when you get the chance, use the cameras to tag all of the guards and the boss.
Our method of approach was to pick of the guards one by one, making our way to a blue lift. Use the lift to reach the upper level, bypassing some of the guards. If the nearby goons won’t turn away, throw one of your lures to distract them and then hop in. This is a high risk, high reward option.
Once you’re on the upper level, take down the target and then choose how you wish to finish things off. You can drive off the side (we chose that one) to make your escape, or you can just eliminate the rest of the guards and walk out like nothing happened. The choice is yours.
Gang Hideout 11 – Beached – Pawnee
In the interest of full disclosure, we got lucky on this one. Approach from the southwest, taking cover at a wall directly behind your first of three targets. Several of the guards have cameras, so hack them and tag all of the guards and targets in the area.
We kicked things off by eliminating a couple of guards with our Spec Ops 1911, staying in the cover we described above. Of course, this brought a lot of people to our area poking around for answers. That is how we got lucky. From our cover behind the wall, we used take down after take down to neutralize the curious guards and targets. In fact, we completed the entire mission from this location. Just keep an eye out to the northwest for anyone who investigates from that direction. You might have to move from one side of the wall to the other.
The chances are you’ll have to eliminate everyone for this mission, rather than just taking out the targets and making your escape. Still, our method worked quite well, even if it was an accident.
Gang Hideout 12 – Out of the Woodwork – Pawnee
Head south across the bridge, then use the angled conveyer belt to reach the inside of the lumber mill. You should be safely above the bad guys, so use the cameras to tag everyone in the area, including the target you’re after.
We used the high ground to kick things off, still using our Spec Ops 1911 to try and remain stealthy. However, it wasn’t long before we were discovered. It’s not a bad thing, your enemies must come to you if they want to take you out, so just stay patient and pick them off until there are none remaining. Take out your target, then get ready for the next one.
The second target is to the southwest, so head that way and finish off his goons before you take him to the ground and make your getaway to complete the mission. You should have taken out the bulk of the forces getting close to the first target.
Gang Hideout 13 – Burning Bridges – Pawnee
This one isn’t really that difficult, it’s more about timing your moves correctly. Approach from the south, vaulting the trailer as you head north into the restricted area. You’ve got three targets to take down, but none of them should present much of a challenge if you work carefully. The only problem is, hacking the cameras to spot all three before you move in is quite difficult. We opted just to move around, profiling all the guards before we eliminated them. That ensured we didn’t kill one of the targets.
Take the guard out by the car on the bridge, then move up to some construction materials beside the vehicle. Look up and to the right of the bridge, taking down the guard stationed above you. Once he is out of the picture, move in to neutralize the first target.
Once that target is down, move to the north, then look over the side of the bridge to a catwalk to the east and below you. There is a lone guard on the catwalk. Shoot him with your Spec Ops 1911 or even use the Spec Ops Goblin if you have that unlocked. With him down, head down the stairs to the west and move east, looking over the railing that connects the east and west side of the bridge. You should see a guard patrolling below you. Shoot him in the head and then continue north via the east side of the bridge.
When the coast is clear, drop down onto the catwalk (where you shot the guard earlier) then turn and go south and down the stairs. Be careful not to get spotted, but when you reach the ground level you can sneak up behind the second target and take him out.
When you reach the north side of the lift, climb up some stairs until you reach a crane. Hop on and use it to move closer to your final target. Simply use your Spec Ops 1911 to take out any guards as you make your way to the top of the bridge. When you arrive, shoot the remaining guards on top, being sure not to alert the rest to your presence. If someone does call for backup, toss a few IEDs on the ground to give them an appropriate welcome. When everyone else is down, beat up the final boss to finish the mission. Make sure to grab any money or ammunition that happens to be laying around before you leave.
Gang Hideout 14 – Decapitated – Pawnee
We approached from the northeast, then headed up the road to take out the sniper who was keeping an eye on the graveyard. With him down, hack a nearby camera and tag the rest of his friends, and the only target that you need to worry about.
The problem with this Gang Hideout is that it’s fairly open, and eliminating the guards without tipping off the rest is difficult. Rather than mess around with stealth and getting caught in the open, we busted out the Spec Ops Goblin and started to pick people off from the high ground. Of course, we were found out and backup was called, but this area provided us a good amount of safety to work our way through all of our foes. With everyone else laying dead on the ground, we moved in and took down the target to finish the mission.
Gang Hideout 15 – The Low Road – Mad Mile
We decided to approach this one from the south, climbing up on a shipping container and then using the plywood on top for cover. Nobody should see you here, so hack the nearby cameras and mark all of the guards and the lone target. Be sure to maintain stealth at all times. Not only will getting caught cause these guys to call their crime loving friends, the target will flee, sending you on a high speed chase through the streets of Chicago.
Start off by shooting the guard in front of you with your Spec Ops 1911, then switch to your Spec Ops Goblin to smoke the guard who comes to investigate. Quickly look to the north, then eliminate a third guard off in the distance. Now jump down and start making your way counterclockwise so that you are eventually behind your target. You will encounter some resistance on your travels, but try to kill them when they are near the perimeter of the restricted area to decrease the likelihood that their bodies are discovered by their pals.
As soon as you get the chance, take down the target, even if it means the rest of the goons spot you. It’s far easier to battle it out with his remaining guards and backup than it is to chase him through the street with them trying to ram you off the road. In fact, once he’s down feel free to jump in your car and leave them behind. Either way, whether you kill everyone or make a daring escape, once this is done you will have finished all the Gang Hideouts and unlocked the Basest Base trophy.